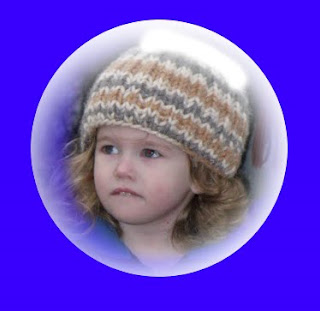
This one works in both PSE and PS with one small adjustment for PSE. As usual, please let me know if you find any errors in this tutorial or have questions.
This tutorial is based on “Simple Bubbles in Photoshop” by Tyler Jordan which can be found here. I have altered the tutorial to use photo’s behind the bubbles so it looks like the item is “inside” the bubble.
- Start with a blank page and fill it with a background that is not white (until bubbles are constructed a plain color fill works best so that you can see your bubbles).
- Make a new layer to make your bubbles on.
- Select the Circle Marquee Tool with no feather and make a medium sized circle. (You can, while holding down Shift, make as many circles as you wish. If you don't like a circle you've made, hold down the Option/Alt Key and deselect it with the Circle Marquee Tool. NOTE: If I’m going to make multiple bubbles, I tend to put each on it’s own layer so that it can be moved or changed independent of all the the others.)
- Once you’ve made your circles, fill them with white.
- If using a photo behind the bubble, now is the time to clip it to the same size and shape as your bubble. Place photo on Layer directly beneath the circle. With photo layer selected, point to the thumbnail of the bubble layer with your mouse, hold the CMD/CTRL key and click, You should now have dancing ants in the size/shape of your circle. Create a feathered Mask*.
- Return to the circle layer. Using the Eraser tool with a feathered brush set to an opacity of 100%, start to erase the middles of the white balls you've made. For this I adjust my brush size to about 75% of each ball and simply click inside each of them three times. That's all you'll need to erase to create your basic bubble. Just make sure you adjust your brush size for each bubble.
- Now it's time to take your bubbles to the next level. Using the Paintbrush, set to feathered and 100% opacity, make short sweeping strokes on the upper corner. Be sure to adjust your brush size for each bubble. Remember, if you are making more than one bubble to place this in the same approximate location of each bubble.
- Add a slight Burn to the bottom, opposite the spot painted above using a feathered Burn tool.
*To create the Mask in PSE:
- Select Layer below photo.
- Point to thumbnail of circle and hold the CMD/CTRL key then click. You will now see the dancing ants.
- Make sure your colors are Default Black/White by pressing D on your keyboard. (If white is the foreground color, press X to switch them).
- Add a ‘Solid Color’ Adjustment layer. Point to the two-toned circle at the top of your layers palette. Click and Select ‘Solid Color’ from the drop down menu.
- Clip the photo layer to the new Adjustment layer by pointing your mouse to the line between the two layers. Hold your Option/Alt key and click when you see the arrow with the yin/yang circle.
- To add feathering, Select a medium to large feathered brush, lower opacity to around 50%. Lightly stroke around the outer edge.
Good tut Lisa:)
ReplyDelete